
Introduction
In the realm of home maintenance, few tasks are as straightforward yet crucial as replacing a bathroom exhaust fan. These unsung heroes of ventilation play a pivotal role in maintaining air quality, preventing moisture buildup, and eliminating unpleasant odors. Whether you’re a seasoned DIY enthusiast or a novice homeowner, this comprehensive guide will equip you with the knowledge and skills to tackle this project with confidence.
The Importance of Bathroom Exhaust Fans
Bathroom exhaust fans are not mere luxuries; they are essential components of a healthy and comfortable bathroom environment. By effectively removing moisture-laden air, they help prevent the growth of mold and mildew, which can lead to respiratory problems and structural damage. Additionally, they eliminate lingering odors, keeping your bathroom smelling fresh and inviting.
Understanding the Replacement Process
Before embarking on the replacement journey, it’s essential to assess the need for a new exhaust fan. Common signs of a malfunctioning fan include excessive noise, vibration, or a noticeable lack of airflow. Visible damage or corrosion is another clear indication that a replacement is in order.
Once you’ve determined the need for a replacement, gather the necessary materials and tools. Selecting the appropriate replacement fan is crucial. Consider factors such as size, CFM (cubic feet per minute) rating, noise level, and features. Essential tools include a screwdriver, wire strippers, caulk gun, and safety glasses.
Safety Precautions
Safety should always be paramount when working with electrical components. Begin by turning off the power to the bathroom circuit at the circuit breaker or fuse box. Ensure proper ventilation by opening windows or using fans. Avoid using open flames or gas appliances, and wear a mask if dealing with dust or debris.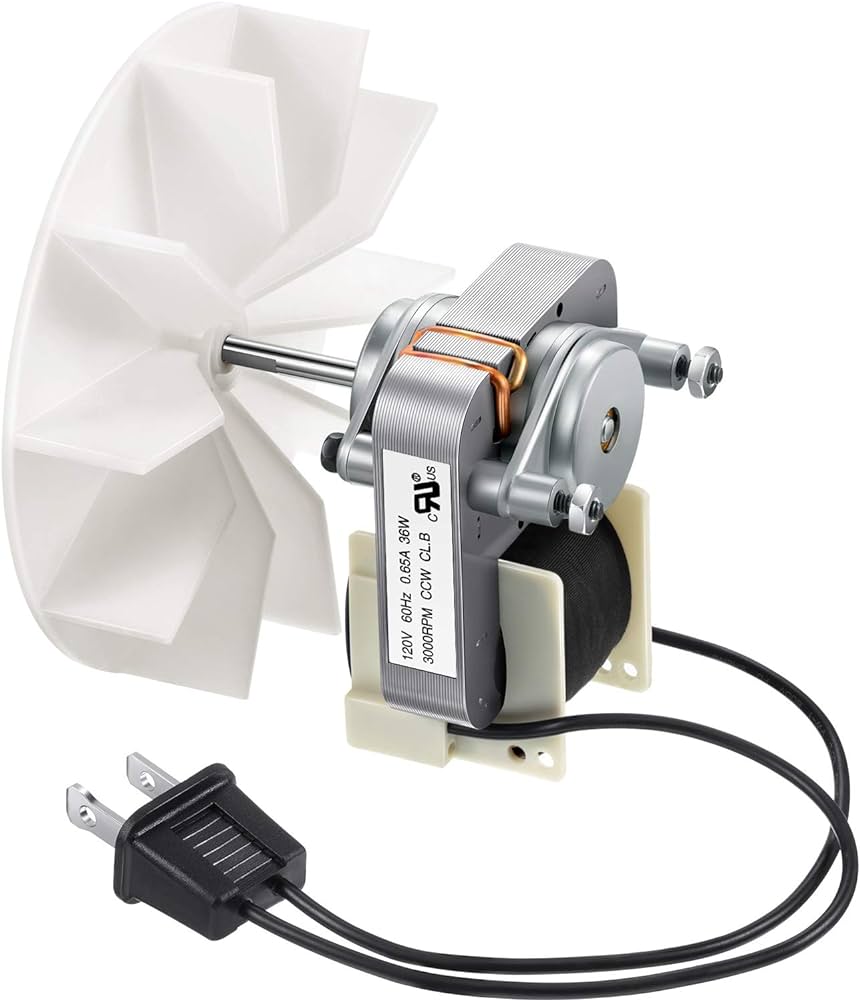
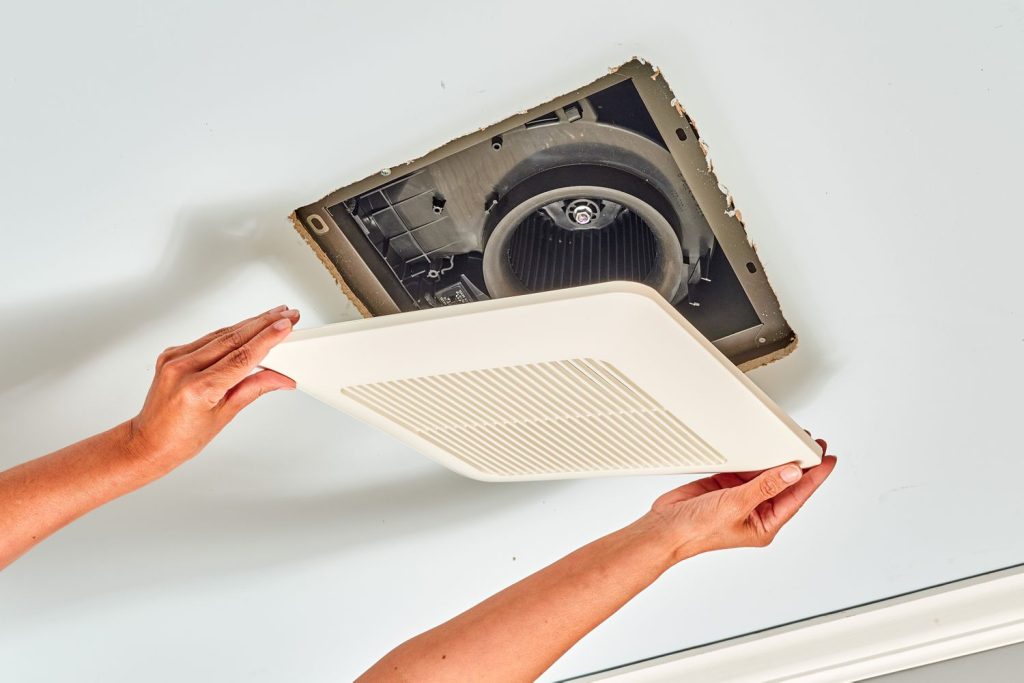
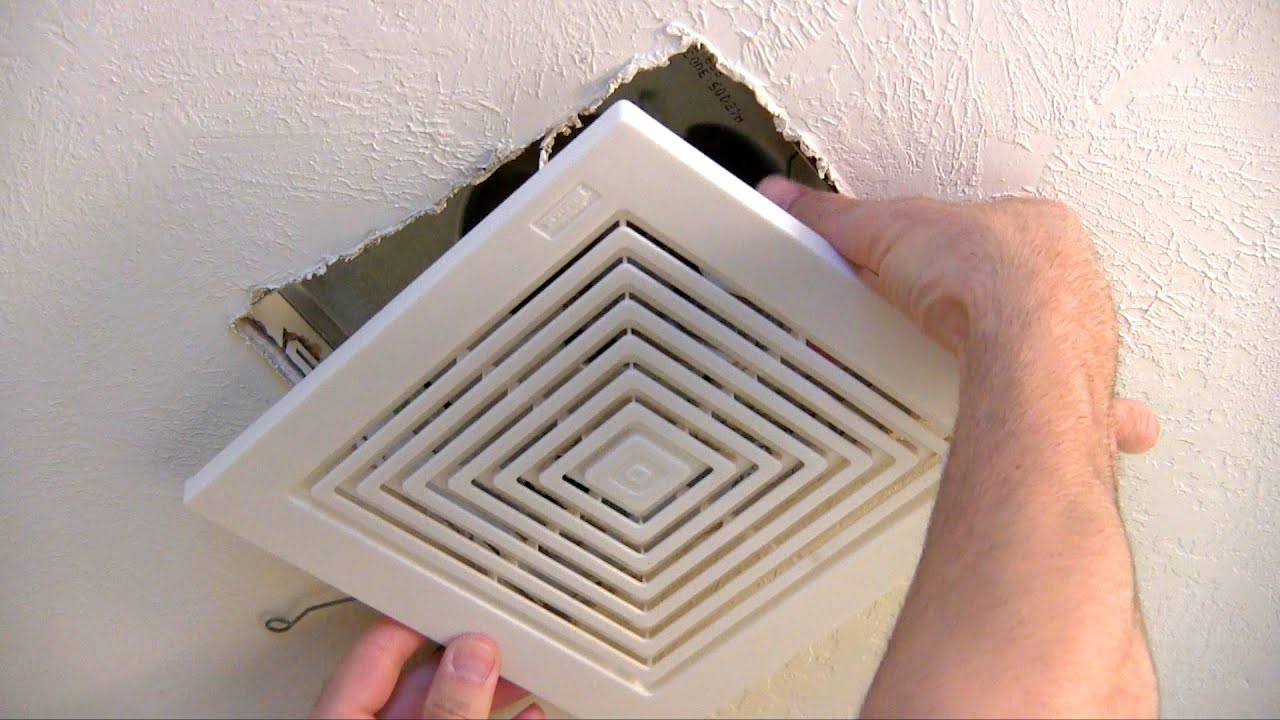
Removing the Old Exhaust Fan
With safety precautions in place, proceed to remove the old exhaust fan. Carefully disconnect the electrical wiring, labeling the wires for reinstallation. Detach the ductwork, ensuring it is properly sealed to prevent debris from entering. Finally, remove the mounting screws and gently pull the fan housing out of the ceiling or joist opening.
Installing the New Exhaust Fan
Prepare the ceiling or joist opening by inspecting it for damage and ensuring it is level. Attach the ductwork to the new fan, securing it with duct clamps or screws. Carefully position the fan housing in the opening, aligning the screw holes, and secure it using mounting screws.
Connect the electrical wiring, matching the wires according to their labels. Secure the wire connections with wire nuts or electrical tape. Install the cover plate, ensuring it is flush with the surrounding ceiling.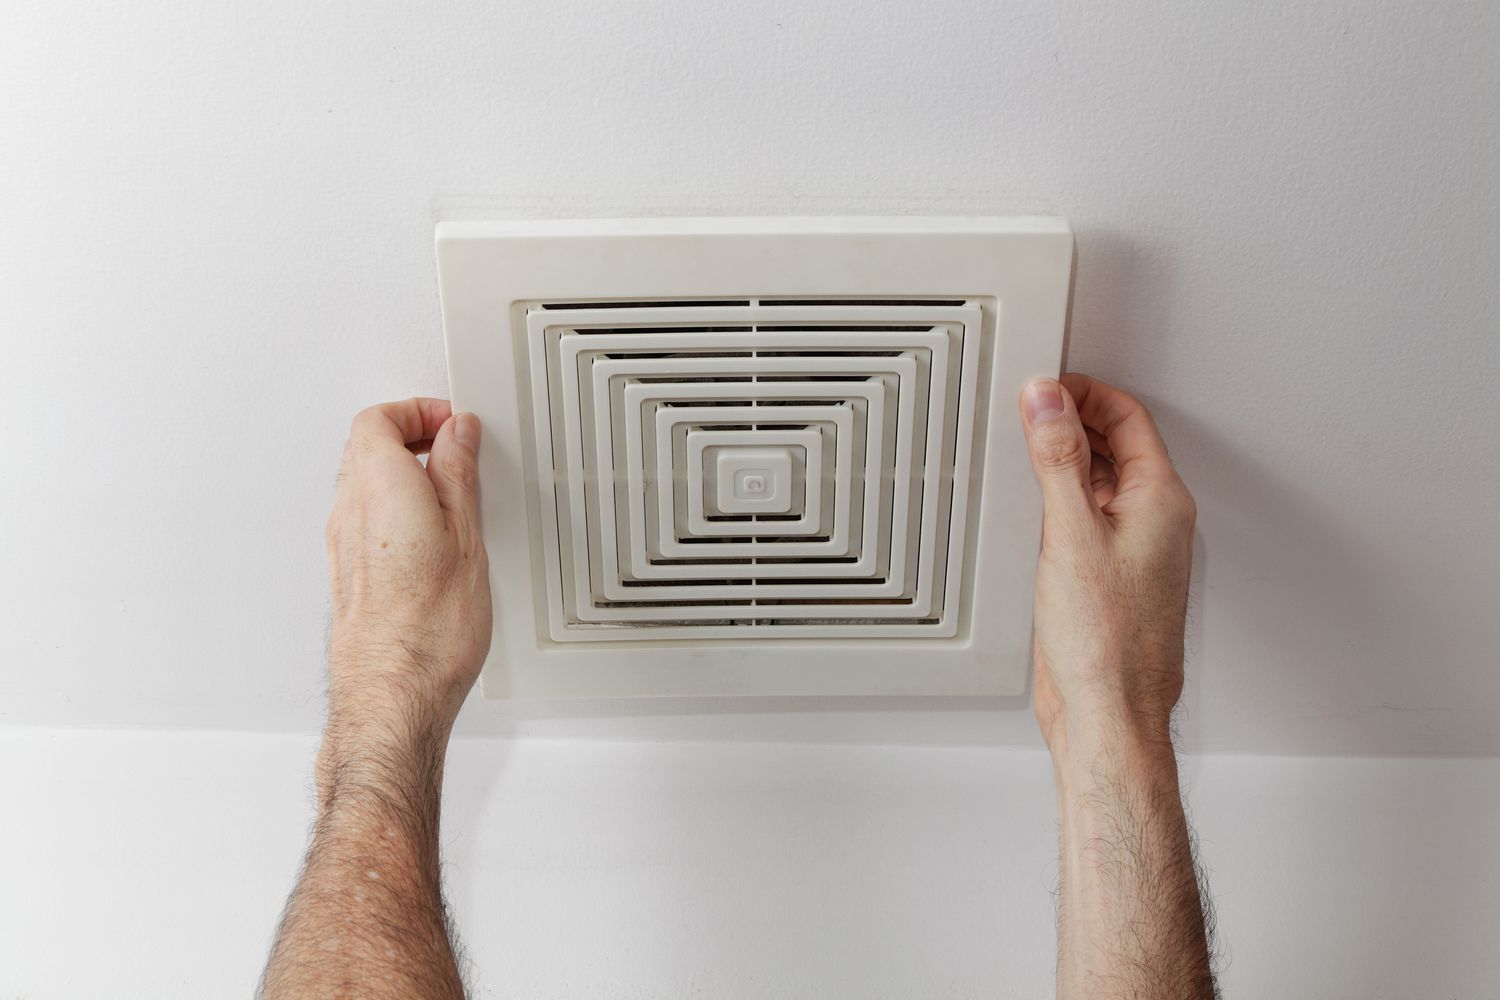
Testing the New Exhaust Fan
Restore power to the bathroom circuit and turn on the light switch to activate the fan. Evaluate fan performance, checking for proper airflow and noise level. Ensure the fan is effectively removing moisture.
Final Touches and Maintenance
Apply caulking around the gap between the fan housing and the ceiling or joist to create a watertight seal. Regular maintenance is essential to ensure optimal performance. Clean the fan blades and housing periodically, replace the filter or charcoal disc if applicable, and check for any signs of wear or damage.
Conclusion
A properly functioning bathroom exhaust fan is an invaluable asset in maintaining a healthy and comfortable home environment. By following the steps outlined in this comprehensive guide, you can confidently replace your old fan and reap the benefits of improved air quality, reduced moisture buildup, and a fresher bathroom. Remember, if you encounter any electrical issues or lack the necessary expertise, don’t hesitate to consult a qualified electrician.
Choosing the Right Replacement Fan
Selecting the perfect replacement fan requires considering several factors to ensure it meets your specific needs and bathroom size. Here’s a breakdown of key considerations:
-
Size: The fan size should be proportional to your bathroom’s square footage. A larger bathroom requires a fan with a higher CFM (cubic feet per minute) rating to effectively remove moisture. Consult a fan sizing chart or talk to a hardware store associate for guidance.
-
CFM Rating: CFM measures the volume of air a fan can exhaust in one minute. A higher CFM rating indicates a more powerful fan. Smaller bathrooms (less than 50 sq ft) may function well with a 50 CFM fan, while larger bathrooms (over 100 sq ft) might require 100 CFM or more.
-
Noise Level: Exhaust fans generate noise while operating. Consider noise level ratings (measured in Sones) when selecting a fan. Lower Sone ratings indicate quieter operation. If noise is a major concern, look for fans with features like sound-dampening insulation.
-
Features: Modern exhaust fans offer various features to enhance functionality and aesthetics. Some models include humidity sensors that automatically activate the fan when moisture levels rise, timers that keep the fan running for a set period after showering, and built-in night lights.
Dealing with Ductwork Challenges
Replacing the exhaust fan is relatively straightforward, but challenges can arise regarding the ductwork. Here’s how to handle potential issues:
-
Shortening Ductwork: If the new fan requires shorter ductwork than the existing one, carefully cut the duct to the appropriate length using tin snips. Ensure a clean, straight cut and secure the connection with duct tape or a metal clamp.
-
Lengthening Ductwork: If the new fan requires longer ductwork, purchase additional duct sections of the same size and material. Connect the new sections to the existing ductwork using duct clamps and ensure all connections are airtight.
-
Changing Ductwork Direction: If the existing ductwork needs to change direction to connect to the new fan, utilize flexible duct elbows. These pre-formed elbows allow you to create smooth bends in the ductwork while maintaining airflow efficiency.
Troubleshooting Common Issues
Even after a successful replacement, you might encounter minor issues. Here’s a quick troubleshooting guide for common problems:
-
Fan Not Turning On: Double-check that the power is switched on at the circuit breaker and the light switch controlling the fan is turned on. Ensure all electrical connections are secure and there are no blown fuses or tripped breakers.
-
Insufficient Airflow: A clogged filter or dirty fan blades can hinder airflow. Clean the filter and blades regularly. Additionally, confirm the ductwork is clear of any obstructions and the CFM rating of the fan is sufficient for your bathroom size.
-
Excessive Noise: Loose fan components or worn-out bearings can cause excessive noise. Ensure the fan is securely mounted and check for any loose parts. If the noise persists, consider replacing the fan with a new model.
Seeking Professional Help
While replacing a bathroom exhaust fan is achievable for many homeowners, there are situations where seeking professional help might be prudent. If you’re uncomfortable working with electrical wiring, lack the necessary tools, or encounter complex ductwork issues, don’t hesitate to call a qualified electrician or handyman. They possess the expertise and experience to ensure the job is completed safely and efficiently.