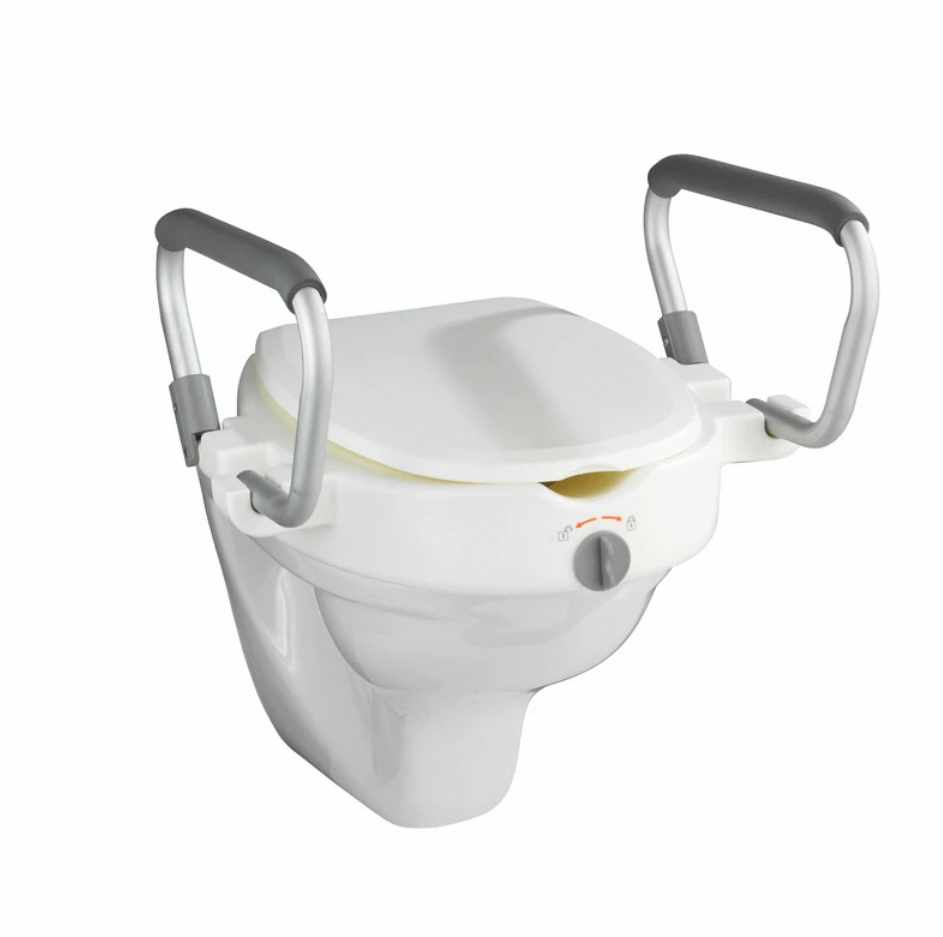
Installing a toilet seat riser can be a simple and cost-effective solution for those who have difficulty bending down or getting up from a low toilet seat. A toilet seat riser can add height to the seat, making it easier to use and more comfortable.
Step 1: Gather the Necessary Tools and Materials
Before beginning the installation process, you will need to gather the necessary tools and materials. Here is a list of the items required:
- Toilet seat riser
- Toilet seat bolts and nuts
- Wrench or pliers
- Measuring tape
- Screwdriver
- Silicone sealant (optional)
Step 2: Remove the Existing Toilet Seat
To install a toilet seat riser, you will need to remove the existing toilet seat. Begin by raising the seat and lid, then locate the bolts on the underside of the toilet seat. These bolts hold the seat in place.
Using a wrench or pliers, loosen the nuts that secure the bolts. Once the nuts are loose, you should be able to remove the bolts and lift the toilet seat off the toilet bowl.
Step 3: Measure the Toilet Bowl
To ensure the toilet seat riser fits correctly, you will need to measure the toilet bowl. Measure the distance between the two bolt holes on the toilet bowl. This distance will determine the size of the toilet seat riser you need.
Most toilet seat risers come in two sizes – standard and elongated. The standard size fits most round toilet bowls, while the elongated size is designed for oval-shaped toilet bowls.
Step 4: Install the Toilet Seat Riser
Once you have measured the toilet bowl and selected the correct size toilet seat riser, it’s time to install it. Begin by placing the toilet seat riser on the toilet bowl. Make sure that the bolt holes on the riser line up with the bolt holes on the toilet bowl.
Insert the toilet seat bolts through the bolt holes on the toilet bowl and the toilet seat riser. Tighten the nuts by hand until they are snug. Use a wrench or pliers to tighten the nuts further, being careful not to over-tighten.
Step 5: Adjust the Toilet Seat
Once the toilet seat riser is securely in place, you can adjust the toilet seat. Most toilet seat risers come with adjustable brackets that allow you to customize the position of the toilet seat.
Adjust the brackets to the desired position, then place the toilet seat on top of the toilet seat riser. Make sure that the seat is centered and level before tightening the nuts.
Step 6: Tighten the Nuts
Using a wrench or pliers, tighten the nuts on the toilet seat bolts. Again, be careful not to over-tighten, as this can cause damage to the toilet bowl or toilet seat riser.
Step 7: Check for Stability
Once the nuts are tightened, check the stability of the toilet seat riser. Sit on the toilet seat and move around slightly to make sure that the seat is secure and stable. If necessary, adjust the brackets to improve stability.
Step 8: Apply Silicone Sealant (Optional)
To further improve the stability of the toilet seat riser and prevent any water from seeping underneath it, you can apply silicone sealant around the base of the toilet seat riser. This step is optional but can help to extend the life of the toilet seat riser.
Apply a bead of silicone sealant around the base of the toilet seat riser, then use your finger or a small brush to smooth it out. Allow the sealant to dry according to the manufacturer’s instructions before using the toilet.
Step 9: Test the System
Once everything is in place and the sealant is dry, test the system. Use the toilet as you normally would and check for any leaks or instability. If everything is working correctly, then you have successfully installed a toilet seat riser!
Installing a toilet seat riser is a quick and easy way to improve the accessibility and comfort of your toilet. With just a few tools and materials, you can install a toilet seat riser in no time. Follow the steps outlined in this guide to install your own toilet seat riser and enjoy a more comfortable and accessible bathroom experience.