Broom holders are essential storage units ideal in organizing cleaning equipment. When properly installed, a broom holder provides the benefit of less cluttered appliances, adequately arranged items and, most importantly, a clean and spacious state overall. However, installation is a crucial factor in utilizing a broom holder in every workspace or household, regardless of the design differences and material combinations, some necessary requirements are consistent and applicable at an equal degree with each hurdle addressed technically and to achieve installation thereof.
Preparatory Requirements
- Tools and Requirements: As always, while performing any self-guided task, observe safety precautions. When installing the broom holder, ensure you have a measuring tape or ruler, a level, a wall anchor, screws, safety glasses, and a screwdriver.
- Proper Material details: Know your work area, including the type of wall that will be holding the broom holder, the weight rating of the chosen Broom holder, and position spacing for kitchen or office purpose usage carefully.
Step-by-Step Guide to Installing a Broom Holder
- Measure the distance from the floor; determine your height of most convenience Point to line up items accessible without them getting below the ground to minimize interface disturbance.
- Identify the Wall Installment Site: Take note of room clearances with circumspections best seen to give more insight, aware of blocking appropriate, and visually fitting mounts. Do this using pencils or masking tape to create visual guides.
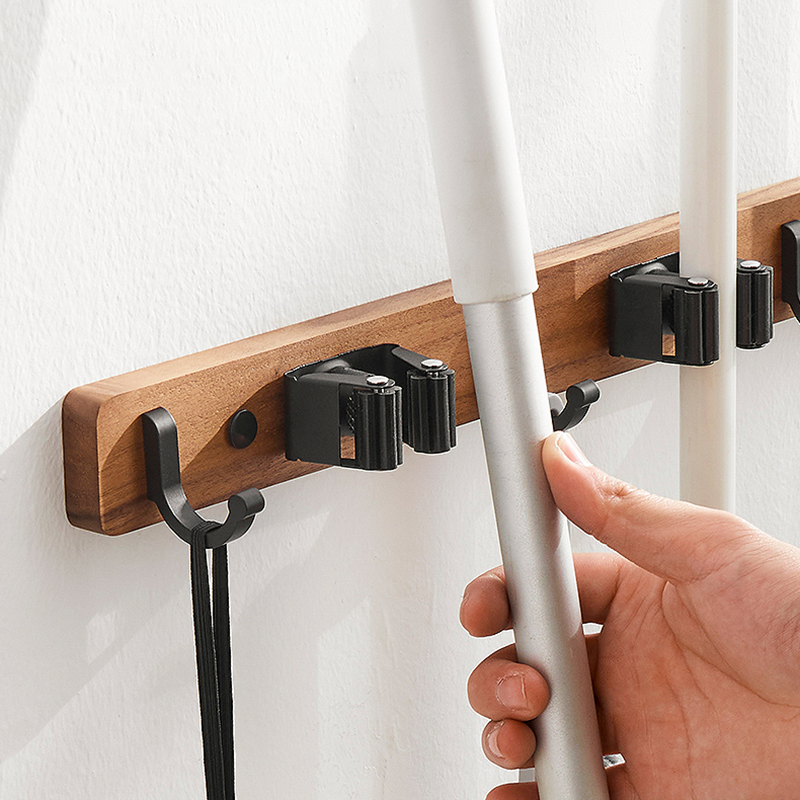
- Classify the Broom Holder: Open the Broom holder packaging to determine if there are angled or curve fittings assembly levels and instruction images and packages coming alongside it that must correspond and make certain to procure the correct Broom holder corresponding design correctly.
- Drill Guide Holes at Proper Alignment: For selection of inclined angle mounting tabs, use levels against sequences determined horizontally and tilts of angular side gear properly align determinately and make properly sloped securing a precursor checks process by creating a small pinhole.
- Attach the Anchors: Connect wall anchors possibly made of metal meant to deepen once driver twists too progress common to needs that bear the allowable burden. Add own snap-lock hardware spaces as mid-board identification piles. With our connected anchors be certain they form secure fixing pivots arranged to transport loads across their designated sectors with continued motions pursuant toward wire-work.
- Hang and Adjust the Broom Holder: Hang the broom holder by screwing clips on the pieces or hinged sides until matching torque pressures align correctly, be sure to screw the holder securely in place cross checking balances along design regulations.
- Re-Evaluate and Re-Instate Adjustments on Items: Run last sweeps after you have completed enhancements to clear fixing lines from in-between gaps. Take notice of any spillages or partially eroded attachments other probable cosmetic application output necessary.
Broom Holder Installation Safety Tips
- Wear Gloves and Safety Glasses when drilling Anchoring points
- Go through pre and post strategy evaluations
- Be aware of outstanding cutting hazards beyond standard examinations
- Review, clean, and maintain all attachments and tool recommendations
Conclusion
Installing a broom holder plays a significant role in providing space and helping keep cleaning equipment out of other essential service areas. By following through this guide, the installation job can be made more simple and optimized into one accord with already prepared easy-to-follow steps on implementation suitable for any design-included styles and fixes implied in broom Holder Installations no matter the arrangement analysis required was just a unique technical aspect of the acquisition, pegging you for operational safety always leading in-between broom holders, satisfaction, preservation, classy aesthetics, effectively capacity, windily easily accessible and extensively helps staff readily identify options throughout quick logical implementation design variants with ergonomic perspectives in compliance of weighing convenience and comfort ultimately come close to achieving that effortlessly deserved functional and safe cleaning environment.